Selecting the Right Kitchen Thermometer: Instant-Read, Infrared, and Remote Probes

Kitchen thermometer guide for home cooks. Learn when to use an instant-read, an infrared thermometer, or a remote probe, plus pros, cons, and calibration tips.
Kitchen thermometer choice affects flavor, texture, and food safety. A kitchen thermometer tells you when chicken reaches 165°F, when a roast is ready to rest, and when oil sits at the sweet spot for frying. Here is why it matters. Heat moves unevenly. The outside of steak browns fast. The center lags behind. A reliable kitchen thermometer removes guesswork so you serve juicy meat, flaky fish, and custards that set without curdling.
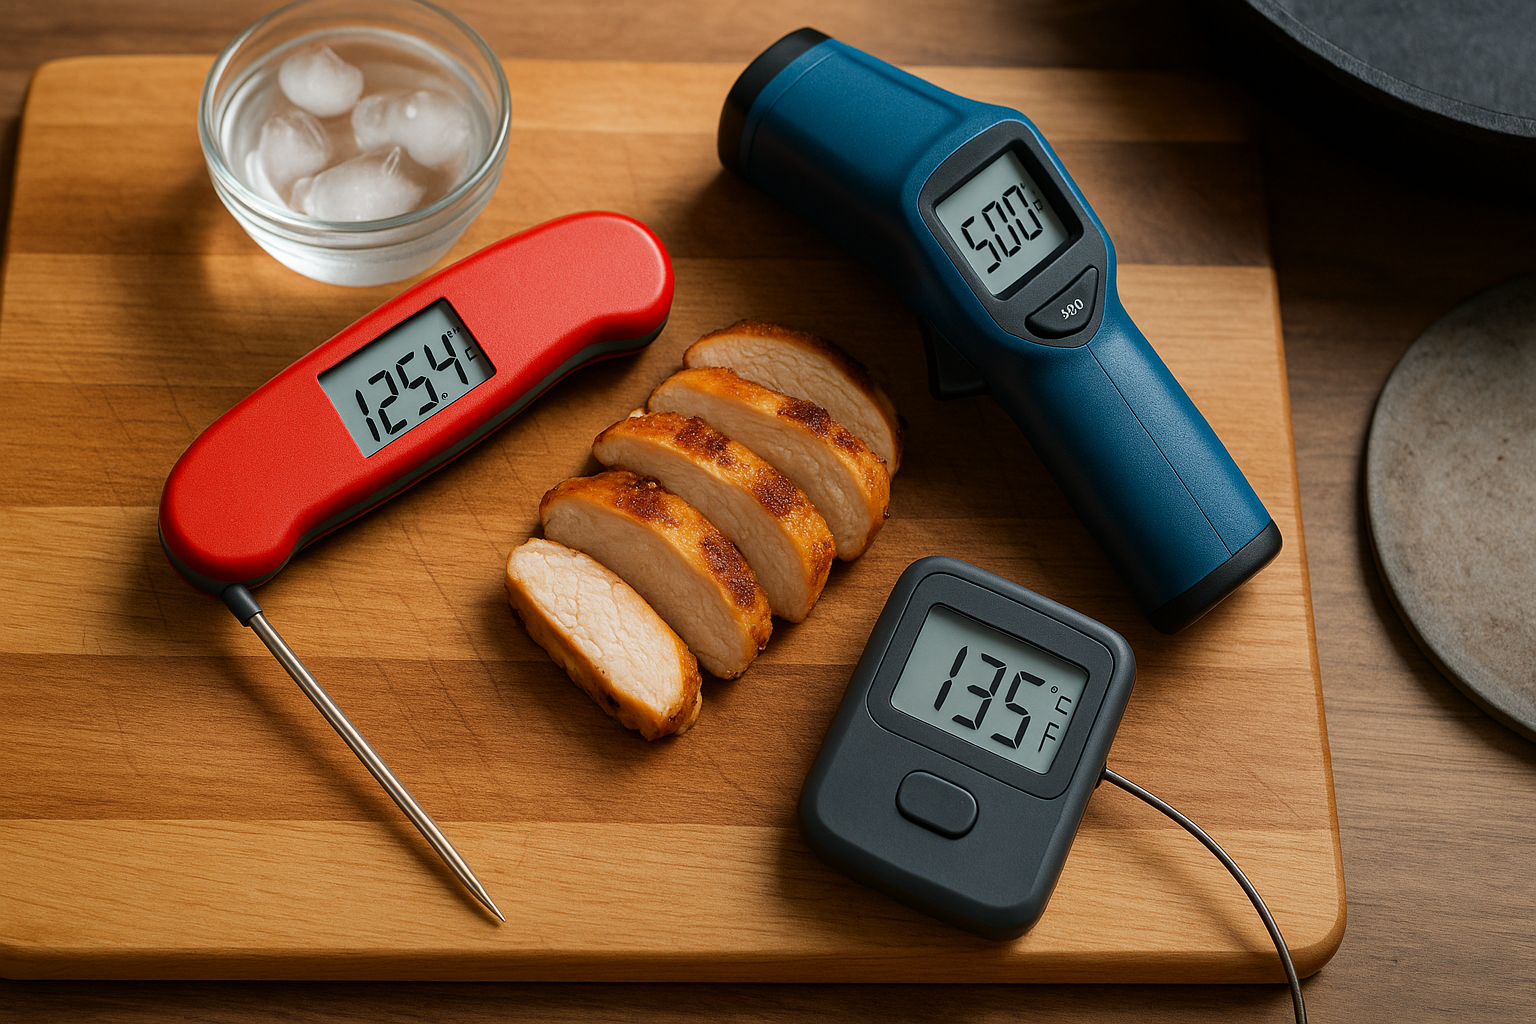
Let’s break it down. In most home kitchens you will see three types: a traditional instant-read probe, an infrared thermometer, and a remote probe with a cable or wireless base. Each style shines in different moments. In this guide I will explain how each kitchen thermometer works, highlight pros and cons, and share real home cooking use cases, including the long-cook roast that benefits from a remote thermometer.
What a kitchen thermometer needs to do
A kitchen thermometer must read accurately, respond quickly, and fit the task. It should be easy to hold with wet hands. The display should be clear under steam. It should stand up to splashes. You also need a plan to check accuracy. Ice-water and boiling-water checks keep a kitchen thermometer honest. More on that in the calibration section.
Food safety also rides on a kitchen thermometer. Poultry must reach 165°F. Whole cuts of beef, pork, veal, and lamb reach 145°F and then rest at least 3 minutes. Ground meats reach 160°F. Fish reaches 145°F. These targets are not guesses. They come from federal food safety guidance, and they are the reason a good kitchen thermometer sits near my stove every day.
Traditional instant-read kitchen thermometer: fast, precise, and versatile
A traditional instant-read kitchen thermometer uses a metal probe that you insert into food. The probe reads internal temperature within seconds. This style handles most daily cooking.
Pros of a traditional instant-read kitchen thermometer
- Internal readings for doneness. You can hit the thermal center of a chicken breast or tenderloin and know what is going on inside. That makes a kitchen thermometer a must for safe poultry and juicy beef.
- Speed. High-quality instant-read models lock in a reading fast. Speed matters at the grill and over a hot pan.
- Accuracy across foods. A probe kitchen thermometer handles meat, fish, bread, custard, candy syrup, and fryer oil with the right technique.
- Compact and durable. Many fold the probe into the handle for storage. A pocket kitchen thermometer fits in a drawer and goes camping.
Cons of a traditional instant-read kitchen thermometer
- You must pierce the food. That tiny hole is minor, but it exists. For delicate pastries, you may choose a different test.
- You measure at one point. You must seek the coldest spot, which takes a little practice.
- Not hands-off. You need to open the oven or grill to take a reading.
My top pick instant-read kitchen thermometer
ThermoWorks Thermapen ONE, No. 1 Recommended Instant-Read Thermometer

Why cooks love this choice: It is fast and consistent. The rotating screen helps in tight spaces. The probe is thin, so it slides into fish or custard without tearing. You can move from skillet to smoker to sugar syrup with one tool. If you bake weekly or cook meat often, this style of kitchen thermometer should be your first buy.
Infrared kitchen thermometer: surface checks in a split second
An infrared kitchen thermometer reads infrared energy from a surface. You point, pull the trigger, and get a surface temperature. It shines when contact is tough or unsafe.
Pros of an infrared kitchen thermometer
- No contact. Scan a pizza stone, griddle, cast-iron skillet, sheet pan, or frying oil splash-free.
- Speed and reach. Check multiple spots in seconds. Map hot and cool zones on a pan or grill.
- Great for surface-driven tasks. Think searing steak, making tortillas, frying, tempering chocolate on a marble slab, or preheating a Dutch oven.
Cons of an infrared kitchen thermometer
- Surface only. An infrared kitchen thermometer cannot read internal temperature. It tells you pan heat or crust heat, not the middle of a roast.
- Emissivity quirks. Shiny stainless steel reflects heat and can fool readings. Matte, dark surfaces read more reliably. You can adjust emissivity settings on some models, but readings still vary across materials.
- Spot size matters. The farther you stand, the larger the measured area. You need to be close for small targets.
A practical pairing
Use an infrared kitchen thermometer to preheat your skillet to 450 to 500°F for steak. Then switch to an instant-read kitchen thermometer to check the internal temperature of the steak after searing. The combo gives you control from pan to plate.
A budget-friendly infrared pick
ThermoPro TP30 Infrared Thermometer Gun
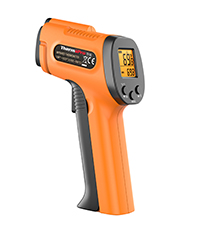
This unit reads fast, has an adjustable emissivity setting, and makes quick work of griddles and pizza steels. Pair it with your instant-read kitchen thermometer and you cover both surface and internal checks.
Remote kitchen thermometer: perfect for roasts, smokers, and long cooks
A remote kitchen thermometer uses a cable probe that stays in the meat during the cook. The probe feeds a base unit or wireless display. Some models connect to an app. This style excels when you need to track a long cook without opening the oven.
Why a remote kitchen thermometer helps
- Hands-off monitoring. Follow internal temperature while the oven door stays shut. Your roast cooks evenly and the kitchen holds heat.
- Alerts at set temps. Set a target, then focus on side dishes. The kitchen thermometer calls you when the roast hits temp.
- Track carryover cooking. Big roasts climb a few degrees after you pull them. Watching the curve teaches you how your oven and meat behave.
- Dual-probe options. Some kits read meat and ambient oven or grill temperature at the same time.
Best use cases for a remote kitchen thermometer
- Prime rib or strip loin roast. Insert the probe into the center from the side. Aim for 120 to 125°F for medium rare, then rest and slice. Your kitchen thermometer watches the climb without constant opens.
- Pork shoulder or beef chuck in a low oven. Set the probe and let connective tissue break down. The kitchen thermometer alerts you when you move from the stall to tender.
- Whole turkey. Place the probe in the thickest part of the breast and another in the thigh if you have two. You can baste without losing track.
- Overnight brisket in a smoker. A kitchen thermometer with two probes and alarms saves sleep. One tracks the meat. One tracks the pit.
- No-knead bread in a Dutch oven. Check loaf temp near the end. A kitchen thermometer reading near 200 to 210°F signals a done crumb for many lean breads.
A solid, simple remote probe
ThermoPro TP16S Digital Meat Thermometer for Cooking and Grilling, BBQ

This pick gives clear alarms and an easy screen. The cable tolerates oven heat, and setup is quick. If you roast on Sundays or smoke brisket once a month, a remote kitchen thermometer pays off fast.
How to choose the right kitchen thermometer for your cooking
Start with your main dishes
- Grilled chicken, steak, pork chops, fish. Get a fast instant-read kitchen thermometer first. You need internal readings at the grill and stove.
- Cast-iron searing, tortillas, pizza steel, candy, deep frying. Add an infrared kitchen thermometer. A surface-focused tool makes preheating and oil control simple.
- Roasts, turkey, brisket, and long braises. Add a remote kitchen thermometer with an alarm. Set it and keep the door closed.
Consider speed, accuracy, and ease
- Response time. Look for sub-second to a few seconds on an instant-read kitchen thermometer. Faster checks mean less heat loss.
- Display. Backlight, large digits, and a rotating screen help near a hot oven.
- Water resistance. Steam and splashes happen.
- Probe thickness. A thin probe tip pierces gently and finds the center.
Budget smart
One high-quality instant-read kitchen thermometer plus one remote probe will cover nearly every recipe on this site. Add an infrared kitchen thermometer if you love cast iron, pizza, or candy. That trio handles daily meals, holiday feasts, and baking projects.
Pros and cons at a glance
Instant-read kitchen thermometer
Pros
- Internal temperature readings
- Fast response
- Works across meat, fish, bread, candy
Cons
- Requires piercing food
- One point at a time
- Manual checks during cooking
Infrared kitchen thermometer
Pros
- Contact-free surface readings
- Maps hot and cool zones quickly
- Ideal for pans, stones, griddles, oil
Cons
- Surface only, not internal
- Sensitive to shiny metals without adjustments
- Spot size grows with distance
Remote kitchen thermometer
Pros
- Hands-off monitoring and alarms
- Great for long cooks
- Helps manage carryover cooking
Cons
- Cable management in tight ovens
- Slightly slower to set up
- Probe placement matters for accuracy
Kitchen thermometer technique that boosts accuracy
Even the best kitchen thermometer needs good technique. Use these habits and your readings will match what you taste.
Find the thermal center
Insert the instant-read probe into the thickest part. Pull the probe back slowly and watch the numbers drop, then rise. The lowest number you see is the thermal center. That gives the truest picture of doneness.
Avoid bone and big pockets of fat
Bone conducts heat and reads hotter. Large fat pockets can read cooler. Aim for solid meat when using a kitchen thermometer.
Take multiple readings
Steaks have edges and centers. Roasts taper. Take two or three readings in different spots to confirm. It takes seconds and removes doubt.
Rest your meat
Heat carries inward after you pull a roast. Plan for a few degrees of carryover. A kitchen thermometer helps you learn how much your favorite cuts climb during rest.
Infrared kitchen thermometer best practices
An infrared kitchen thermometer can be very accurate when you use it correctly.
- Mind surface type. Matte cast iron, black pizza steel, and dark baking stones read well. Shiny stainless can bounce energy and read low. If your model has an emissivity setting, set it near 0.95 for most cookware and surfaces that are dark or matte. Use a piece of matte tape on very shiny surfaces when you need a consistent reading.
- Watch the spot ratio. Stand close enough so the measured area is smaller than your target surface. Check your manual for the distance-to-spot specification.
- Stir liquids first. Give stock or oil a quick stir, then aim the infrared kitchen thermometer at the moving surface to get a better average.
- Pair with a probe. Use the infrared kitchen thermometer to preheat and the instant-read kitchen thermometer to confirm internal doneness.
Remote kitchen thermometer use cases and setup
A remote kitchen thermometer shines on long cooks. Here are step-by-step examples you can use tonight.
Prime rib in the oven
- Salt the roast and bring to room temp for 45 to 60 minutes for even cooking.
- Insert the probe from the side into the center. Avoid bone.
- Preheat the oven to 250°F for a gentle roast.
- Set the kitchen thermometer alert to 120 to 125°F for medium rare.
- Let the roast rest 20 to 30 minutes. Sear in a hot oven or skillet if you want a darker crust.
- Slice. Your kitchen thermometer kept the door shut and the temp true.
Pork shoulder for pulled pork
- Rub the shoulder and set the oven or smoker to 250 to 275°F.
- Insert the probe into the thickest section.
- Set an alert for 160 to 170°F to get through the stall.
- Wrap if you like, then cook to 195 to 205°F until the probe slides in like butter.
- Rest in a cooler or warm oven for an hour. Shred.
Whole turkey
- Place one probe in the thickest part of the breast and one in the thigh if you have two.
- Roast at 325°F.
- Pull when the breast reads 160 to 162°F and the thigh reads near 175°F. Carryover pushes the breast to 165°F.
- Rest, then carve. A kitchen thermometer here saves stress on big holidays.
Calibrating and caring for your kitchen thermometer
Accuracy drifts over time. You can check a kitchen thermometer with two simple tests.
Ice-water test
Fill a glass with crushed ice and a little water. Stir. Wait 1 minute. Insert the probe tip into the slush without touching the glass. A properly calibrated kitchen thermometer reads 32°F. If yours shows a different number, note the offset or adjust if your model allows.
Boiling-water test
Bring a deep pot to a rolling boil. Insert the probe tip in the moving water without touching the pot. At sea level, boiling water is 212°F. At higher elevation the boiling point drops, so adjust your expectation by a few degrees if you live up high.
Care tips
- Keep probes clean and dry.
- Do not put a probe body in the dishwasher unless the maker says it is safe.
- Coil probe cables loosely. Sharp bends can break internal wires.
- Replace button batteries on schedule, and keep a spare on hand.
- Store your kitchen thermometer where you can reach it fast. Tools you see are tools you use.
Safe temperature targets to memorize
A kitchen thermometer is only as helpful as the number you aim for. Tape these to your fridge.
- All poultry: 165°F measured at the thickest part.
- Ground meats: 160°F.
- Whole cuts of beef, pork, veal, lamb: 145°F and rest at least 3 minutes.
- Fish: 145°F or until flesh flakes and looks opaque.
Use your instant-read kitchen thermometer to confirm these numbers in the center. A remote kitchen thermometer helps you track the climb. An infrared kitchen thermometer helps you preheat pans and stones to support browning.
Which kitchen thermometer should you buy first?
If you cook meat even once a week, start with a fast instant-read kitchen thermometer. It covers the widest range of tasks and boosts both safety and flavor. If you own cast iron, make tortillas, or bake pizza on steel, add an infrared kitchen thermometer for surface checks. If you love weekend roasts or own a smoker, add a remote kitchen thermometer with alarms.
Next steps: Pick one tool today and put it to work on dinner. Use the ice-water check before you start. Take two readings in the thickest part. Rest your meat. Your kitchen thermometer will earn its place in the drawer by making tonight’s meal better.
Product links in this guide
-
Instant-read:
ThermoWorks Thermapen ONE, No. 1 Recommended Instant-Read Thermometer
-
Infrared:
ThermoPro TP30 Infrared Thermometer Gun
-
Remote probe:
ThermoPro TP16S Digital Meat Thermometer for Cooking and Grilling, BBQ